Deleting a VoiceThread
New VT
From the home page
- Click on the menu icon in the bottom-right corner of the VoiceThread thumbnail.
- Click on the trash can icon (Label: “Delete”).
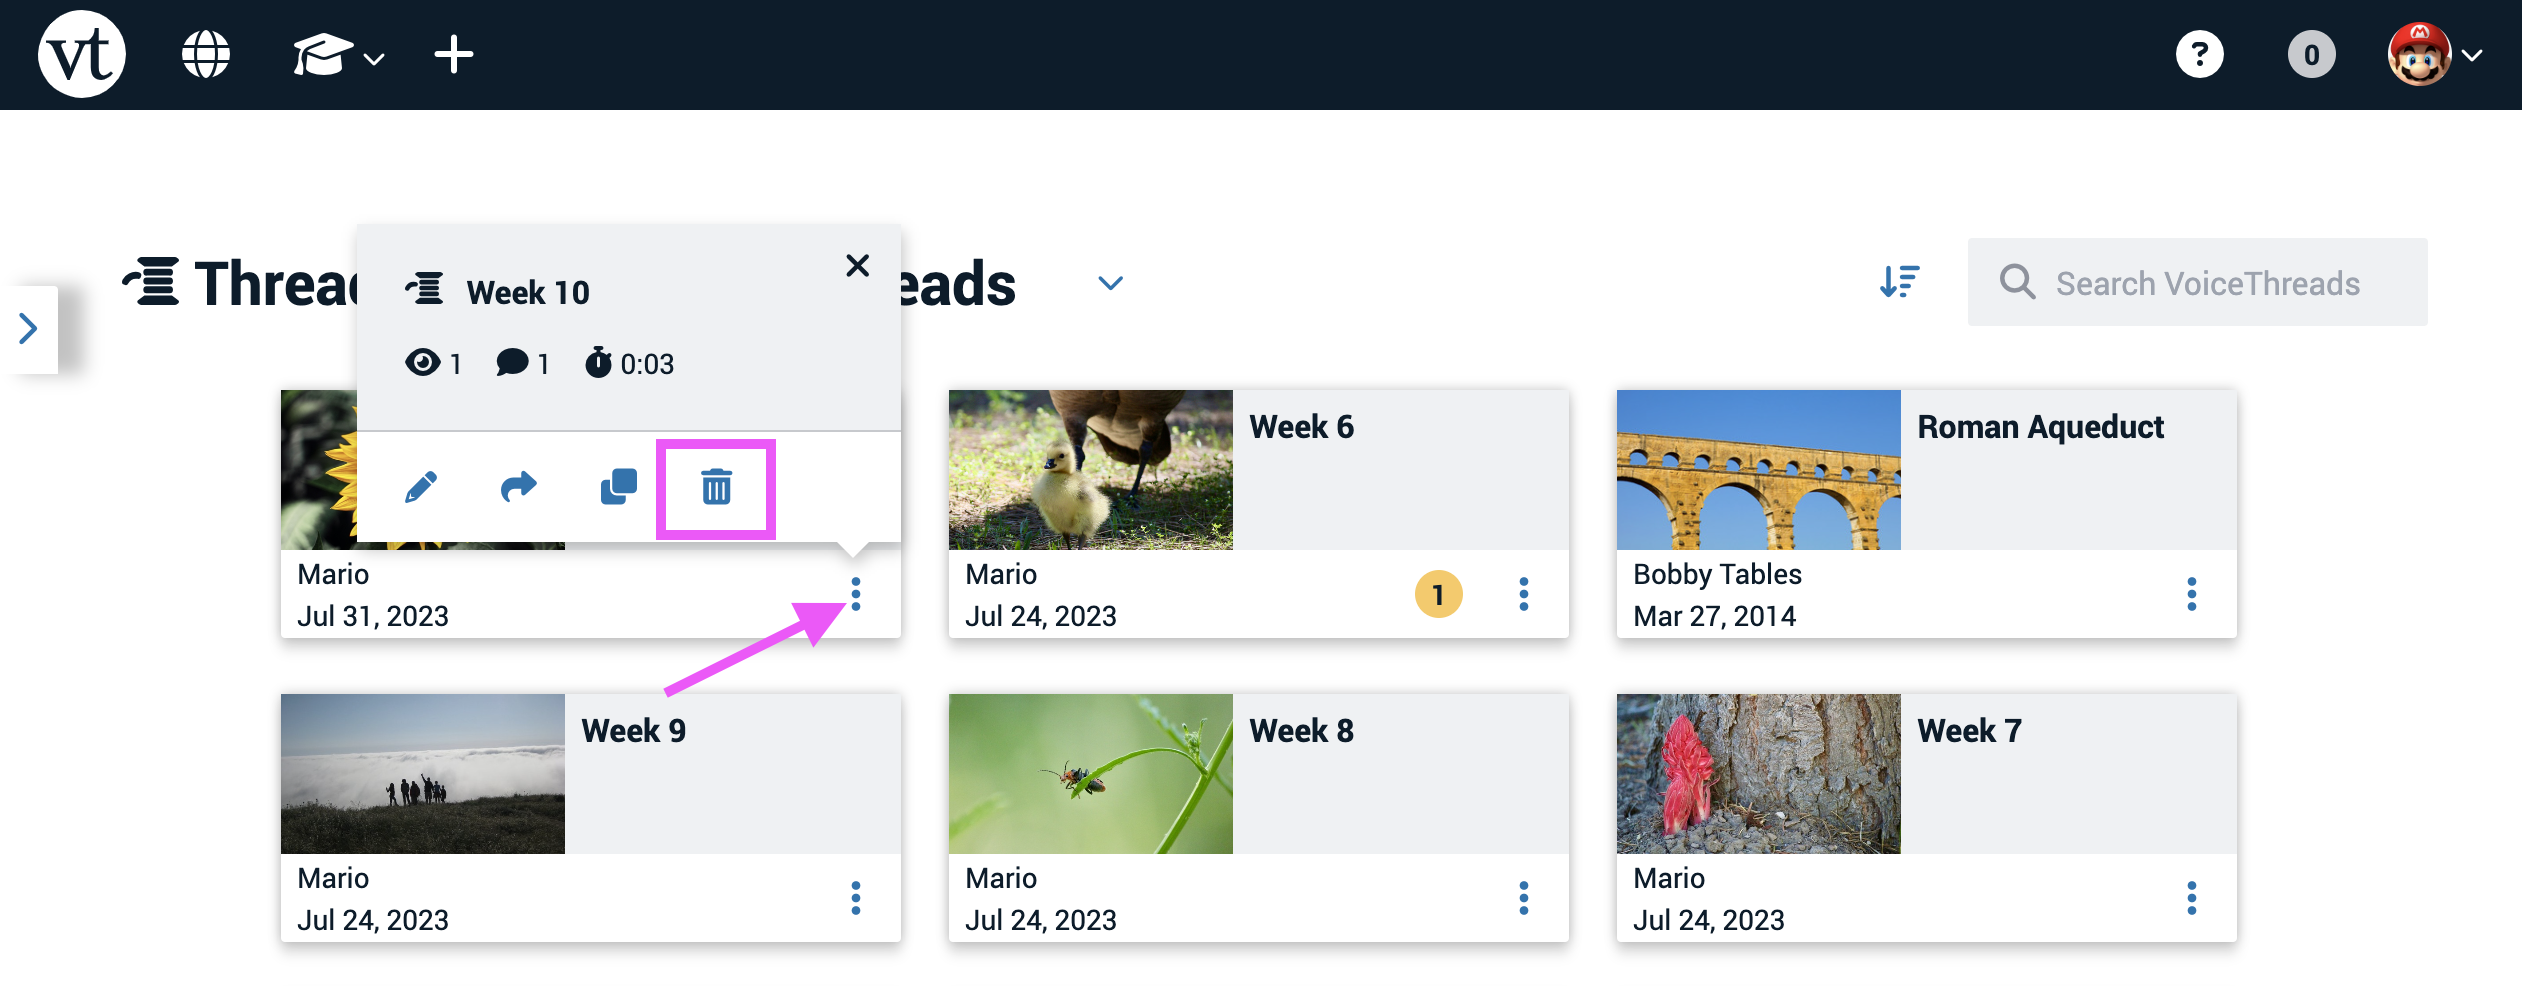
- Confirm.
From the edit page
-
Access the edit page.
-
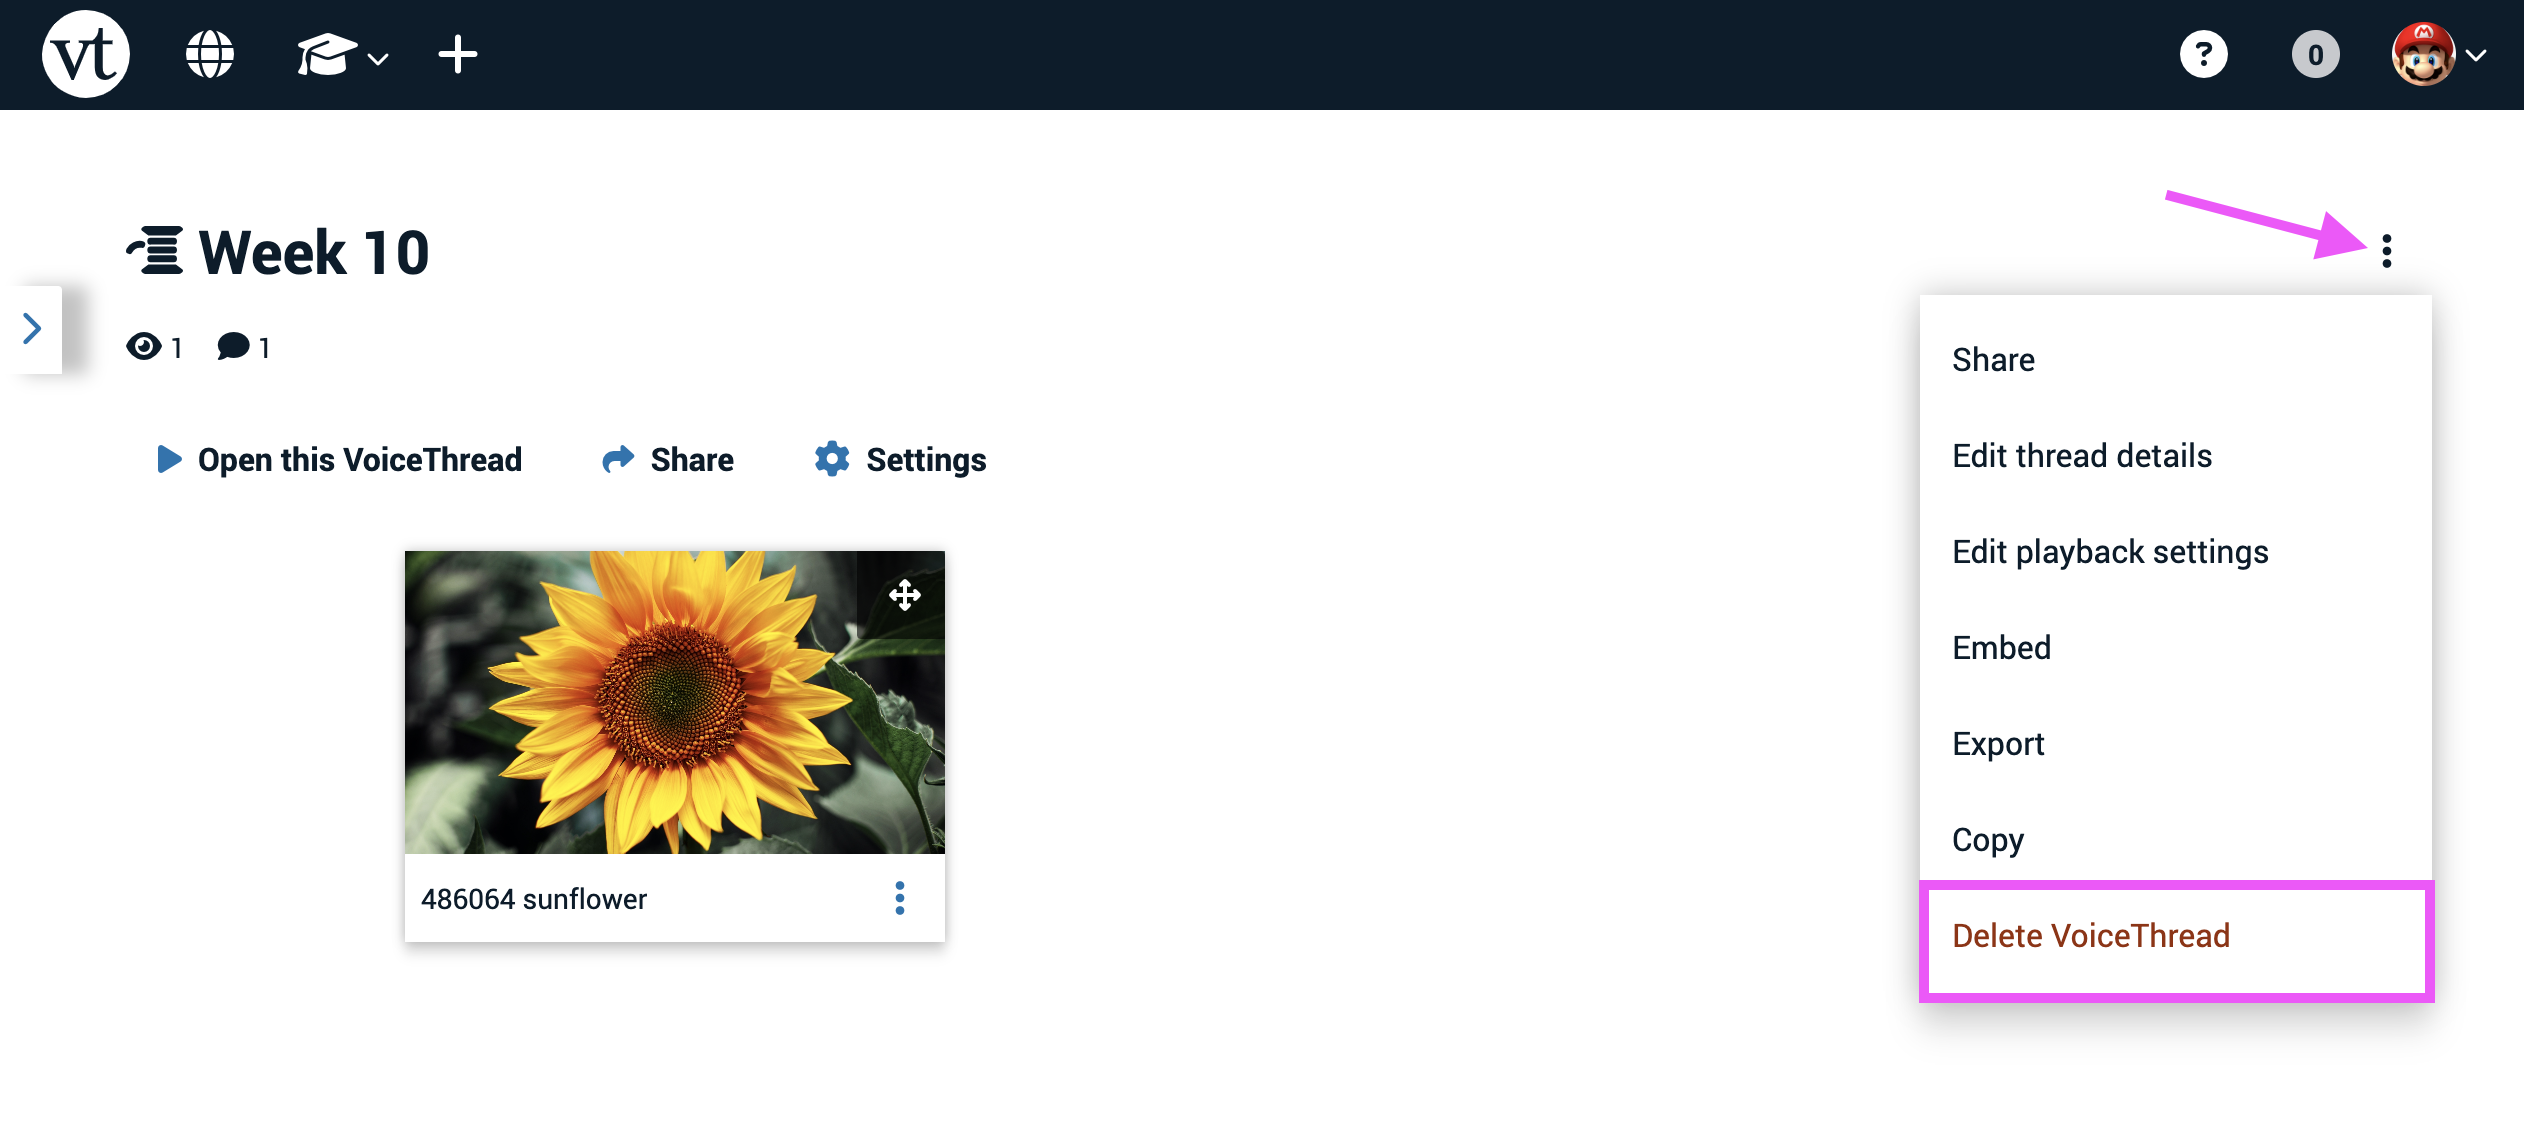
Click on the menu icon in the top-right corner of the page.
-
select “Delete VoiceThread” from the menu.
-
Confirm.
-
Click on the menu icon in the top-right corner of the page, and select “Turn management mode on.”
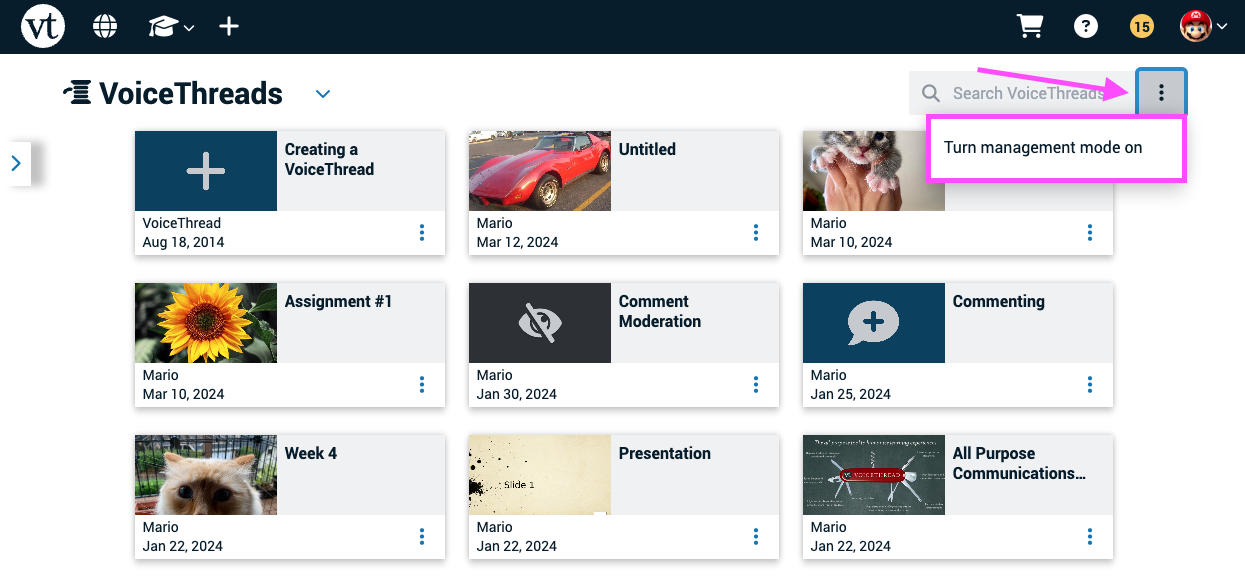
- Check the boxes for any VoiceThreads you want to delete.
- Click on the delete button for any one VoiceThread or at the top of the page.
- Confirm.
Note: If you delete a VoiceThread by mistake, you can retrieve a recently deleted VoiceThread from the trash.
Legacy VT
From the Edit page:
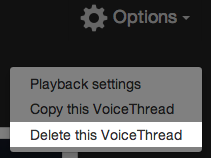
- Click on the Options menu in the top-right corner.
- Select “Delete this VoiceThread”.
- Confirm your deletion.
From the VT Home page:
- Go to the VT Home page.
- Hover your mouse over the VoiceThread you wish to delete.
- Click on the trash can button in the bottom-right corner of that overview.

- Confirm your deletion.
Dragging to the trash
- Go to the VT Home page.
- Click and drag your VoiceThread onto the trash can at the bottom-left corner of the page.
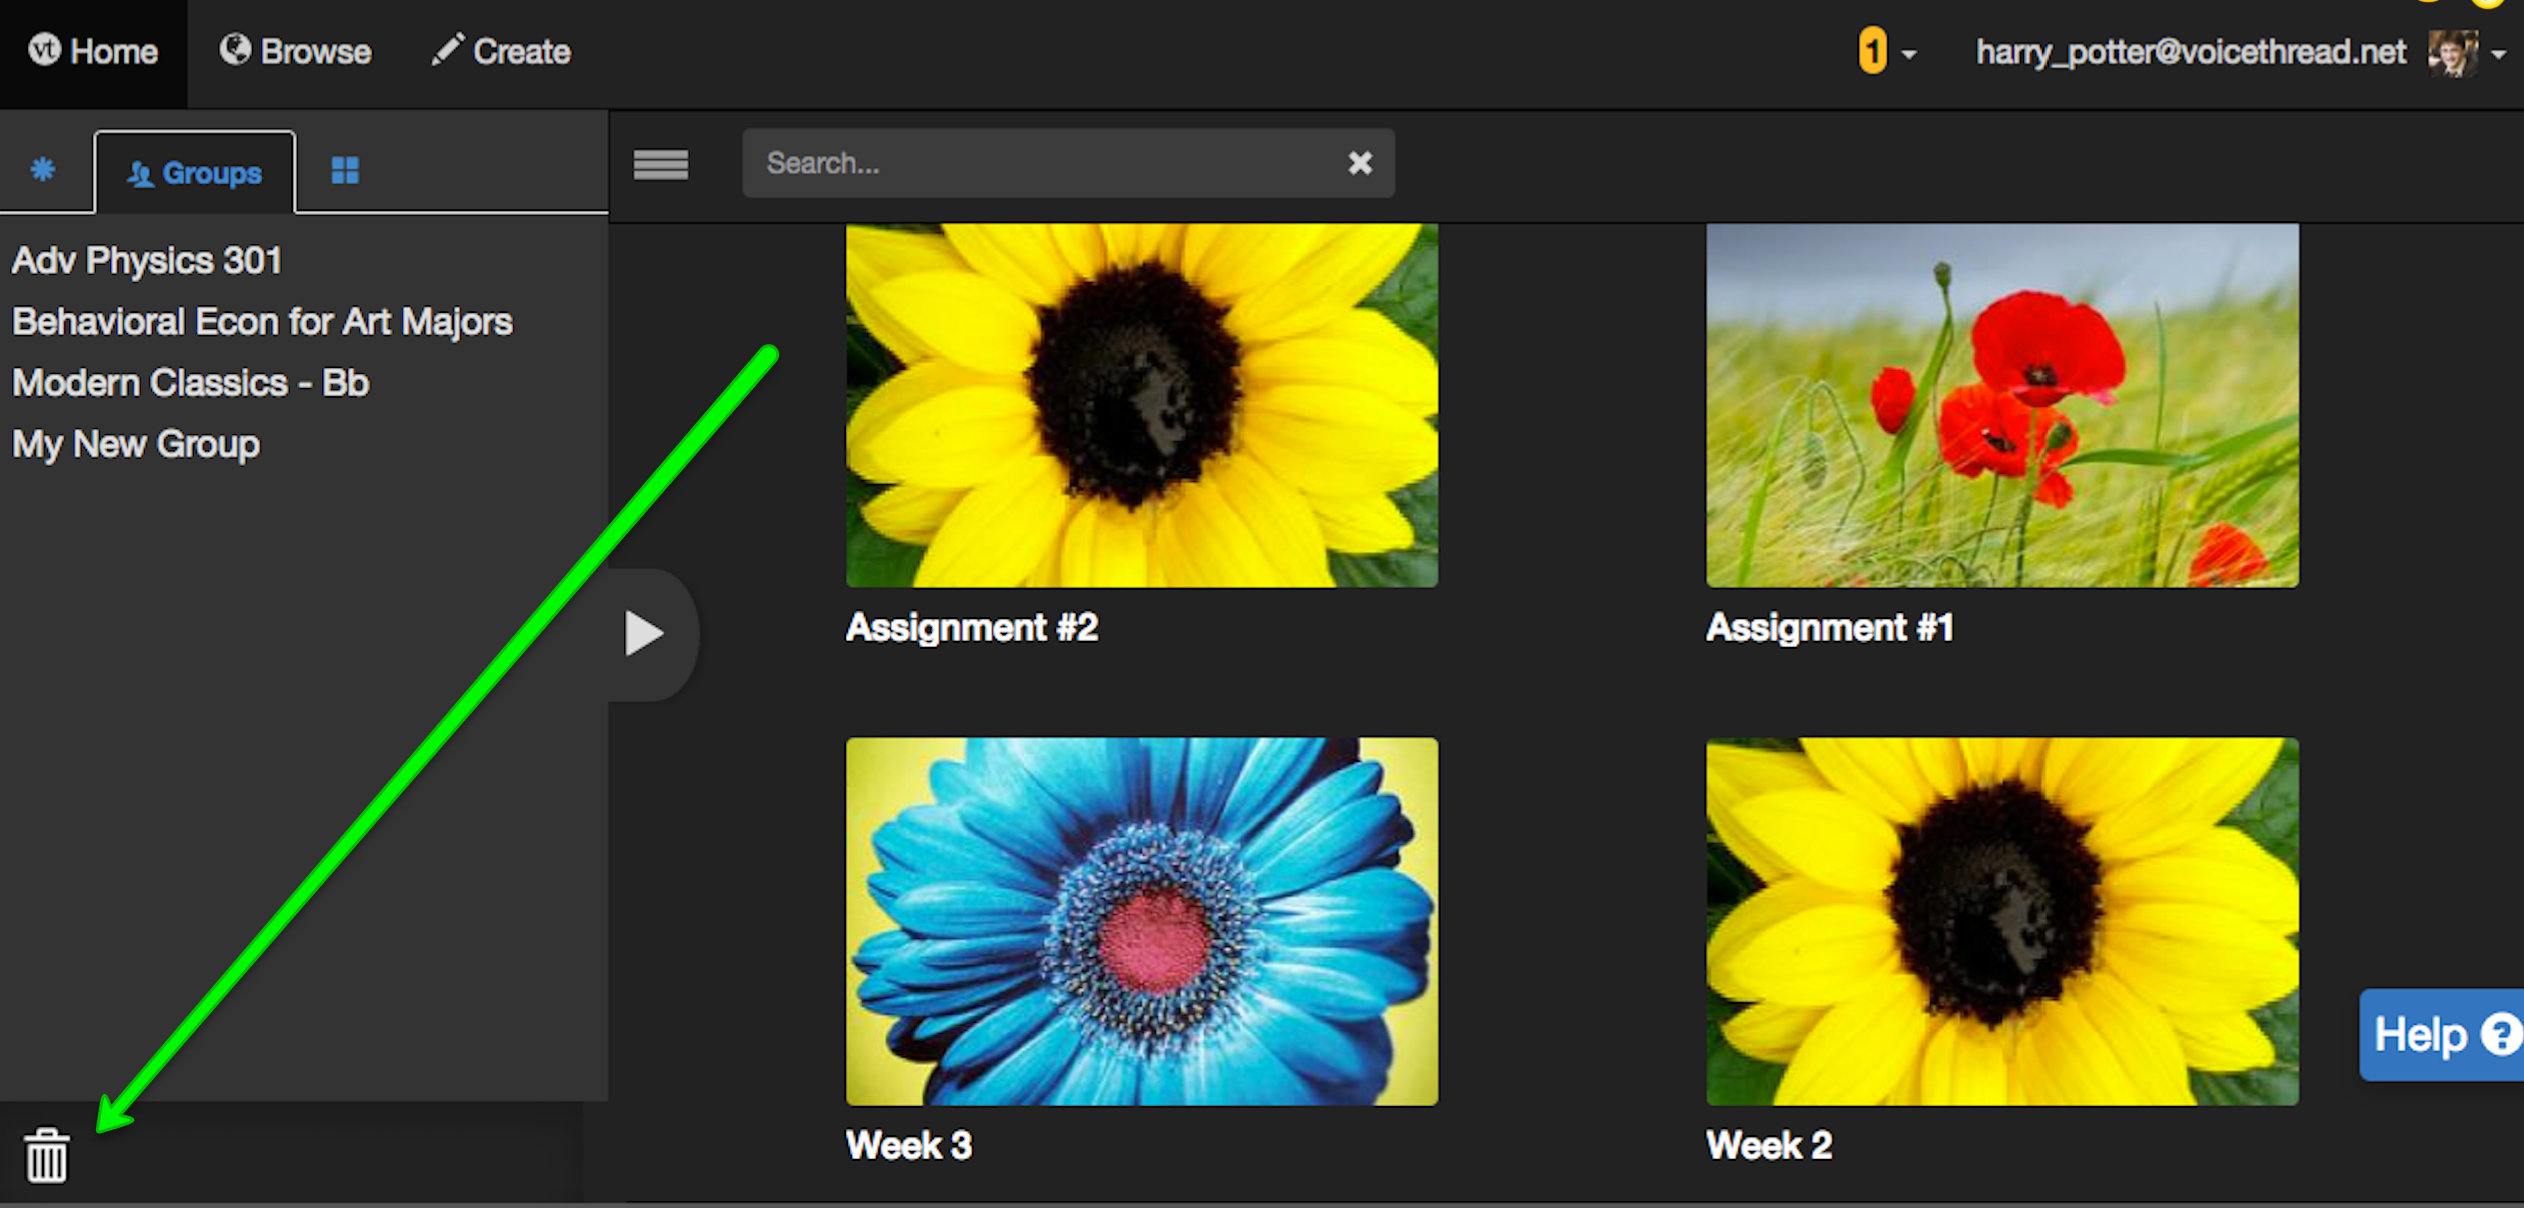
To delete multiple VoiceThreads at once:
- Go to the VT Home page.
- Check the box in the top-left corner of each VoiceThread you wish to delete to select it.
- Click on the trash can button at the top of the page.
- Confirm your deletion.

Note: You can retrieve a recently deleted VoiceThread from the Trash. Learn more here. If you want a VoiceThread to be deleted permanently without any chance for retrieval, please follow these steps:
- Click on the trash can icon in the bottom-left corner of the sidebar.
- Check the box next to the VoiceThread you want to delete permanently.
- Click on the red “Delete” button at the top of the window.
- Confirm.